At 2600 tri they are actually consider mobile level, but things are never that easy.
This is the rule of thumb: 1 000 - 4 000 very Low poly, 8 000 - 16 000 Low Poly, 32 000 - 64 000 Mid Poly and any thing above that is high poly for a game.
With the main character as the most important object in the game, it decides the poly count for the rest of the game.
7 hours ago, mathiasxx94 said:
I've tried looking for triangle count and texture sizes for various props in current gen games, but find it hard to find specs other than for characters.
It is because things isn't that simple. basically when rendering you can think of it like a health bar. Meshes, textures, shaders, amount of objects and animations all consume a bit of that health.
Take Infamous Second Son and (+/- 120 000 tri) and Order 1886 (+/- 100 000 tri) looks very similar but if I had to take a guess I would say Infamous uses 3 meshes per character(Head, upper body, lower body) with a very simple UV map and one smooth group. Order 1886 probably uses 2 meshes (Head, Body) lots of smoothing, UV as needed and heavy focus on large triangles.
As for terrain Infamous focuses on Large meshes with smaller details, a common approach for large world games, that allow details to be LOD away. So a building would have large(walls and windows), medium (Fans, railings, fire escapes) and small(Lamps, wires, ornaments) LODing as needed.
Order 1886 has large and small details showing inconsistent. It's not strange to see a large flat wall leading to a very complex and detailed part of the exact same wall.
The results is that in the Order you get a very consistent triangle count over the whole scene and in Infamous the triangles is much denser near the player than further away.
8 hours ago, mathiasxx94 said:
Given the information given below, do you think the triangle count and texture size is acceptable
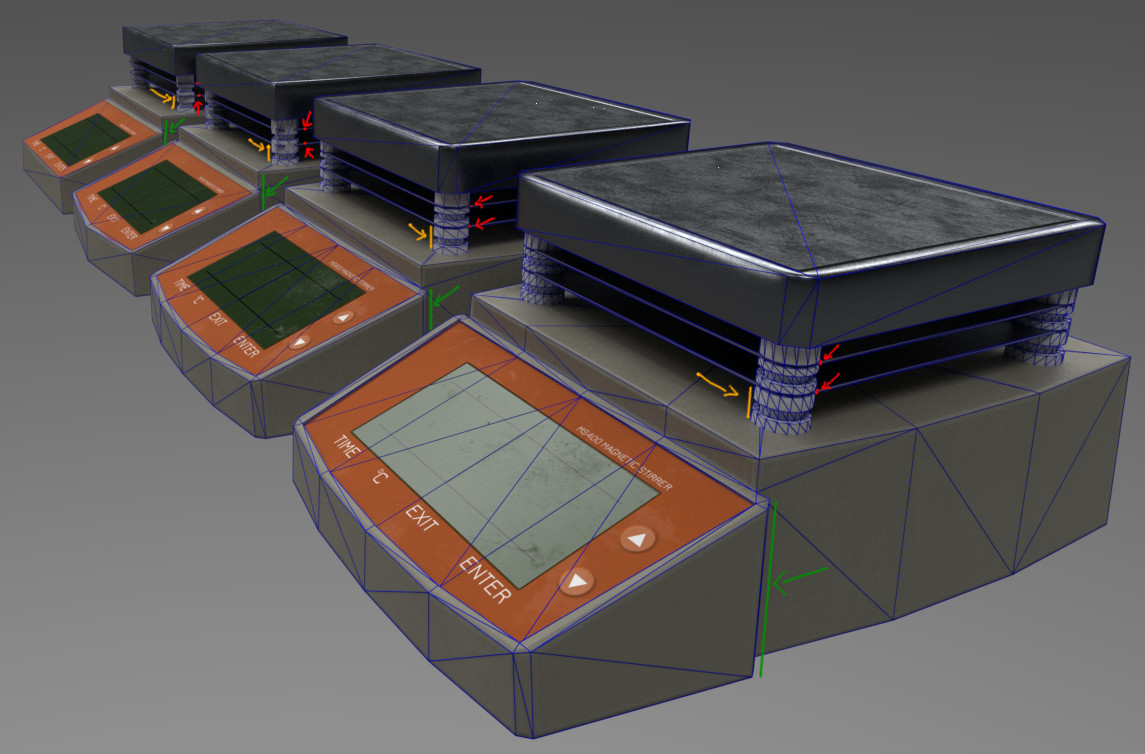
As you can see here you are preserving details, this is the same way I expect the Order 1886 graphics work. Where with Infamous red details would be removed on first LOD and yellow on second LOD.
Your model is so low poly here would be merged with other models in a process known as batching to save on meshes.
All you have to remember is that the smooth groups, UV map and mesh for a large environment model should be +/- 64 000 vertices. After that the engine needs more than one mesh to represent the same object. Dividing is often done behind the scenes. Any mesh larger than 64 000 isn't one mesh in engine.
Modern engines run huge amounts of polygons with a single shader and instancing. https://youtu.be/oMIbV2rQO4k?t=1485
11 hours ago, mathiasxx94 said:
No way to know what texture sizes will be needed. The best way to solve this is to give the master textures and to inform the down-loader to scale textures as needed.
The main problem is that different games have different texel densities and some completely ignore good texture practices.
8 hours ago, mathiasxx94 said:
Should I add similar/mirrored UV's that can't be seen simultaneously on top of each other to preserve UV space? Do I need extra UV maps for light map generation if I do that?
If you use mirror UVs then yes you need a shadow map, also when using modular workflow.
For this asset there is no need for mirror UVs. Mirror UVs are for very large assets. The performance you save here wouldn't be worth the drop in quality.
9 hours ago, mathiasxx94 said:
To get nice normal bakes I had to add UV seams add every sharp edge.
Feel like I need to mention you can do the same thing by baking a object normal and converting to a tangent normal. Works every time because Hard Edge models have 90 degree angles.
Second you can just use a 2 bevel there. The argument is that modern rendering is so fast that the time this saves (No UV splitting of cages needed) more than make up for the small, almost insubstantial, performance loss. The basic workflow is to also bake the normals from the higher mesh into the lower, to control the bevel shading. https://www.youtube.com/watch?v=oAGEGBulzSU
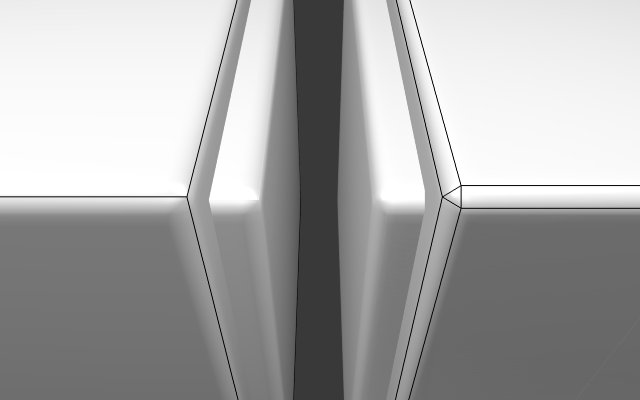
You can stick with what you know if you want the results from both is identical to most players, the 2 bevel is just faster(10-12%). Only cost slightly more in rendering time ( < 2%).
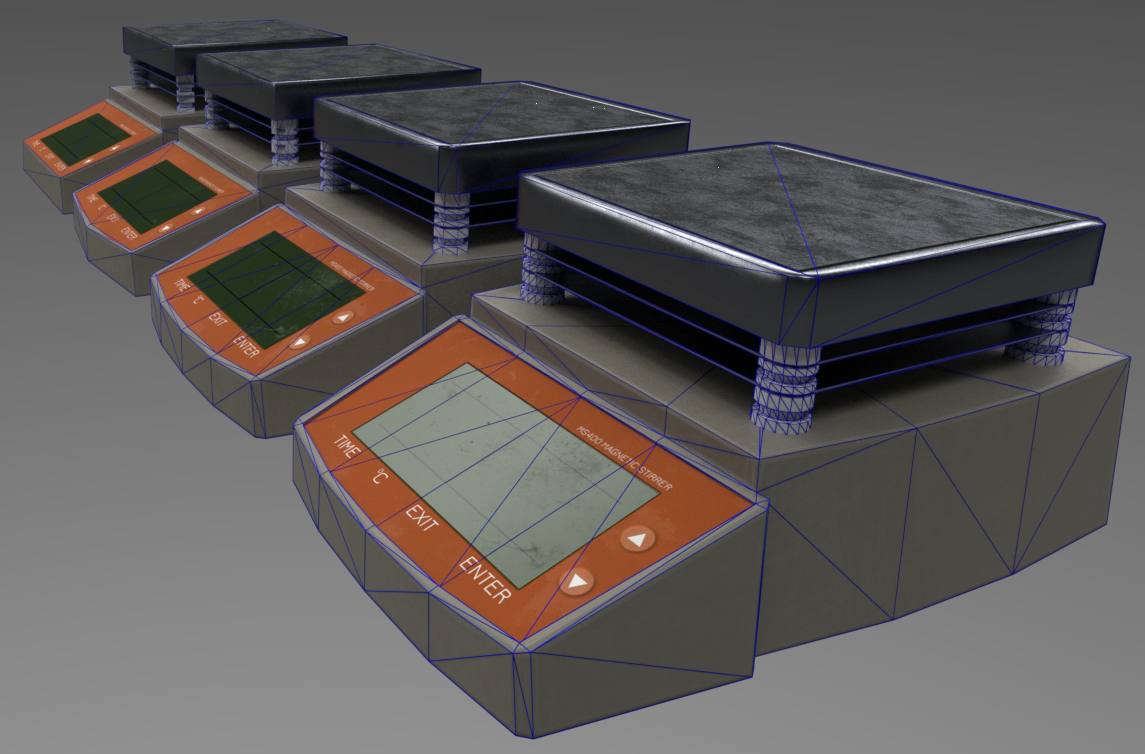
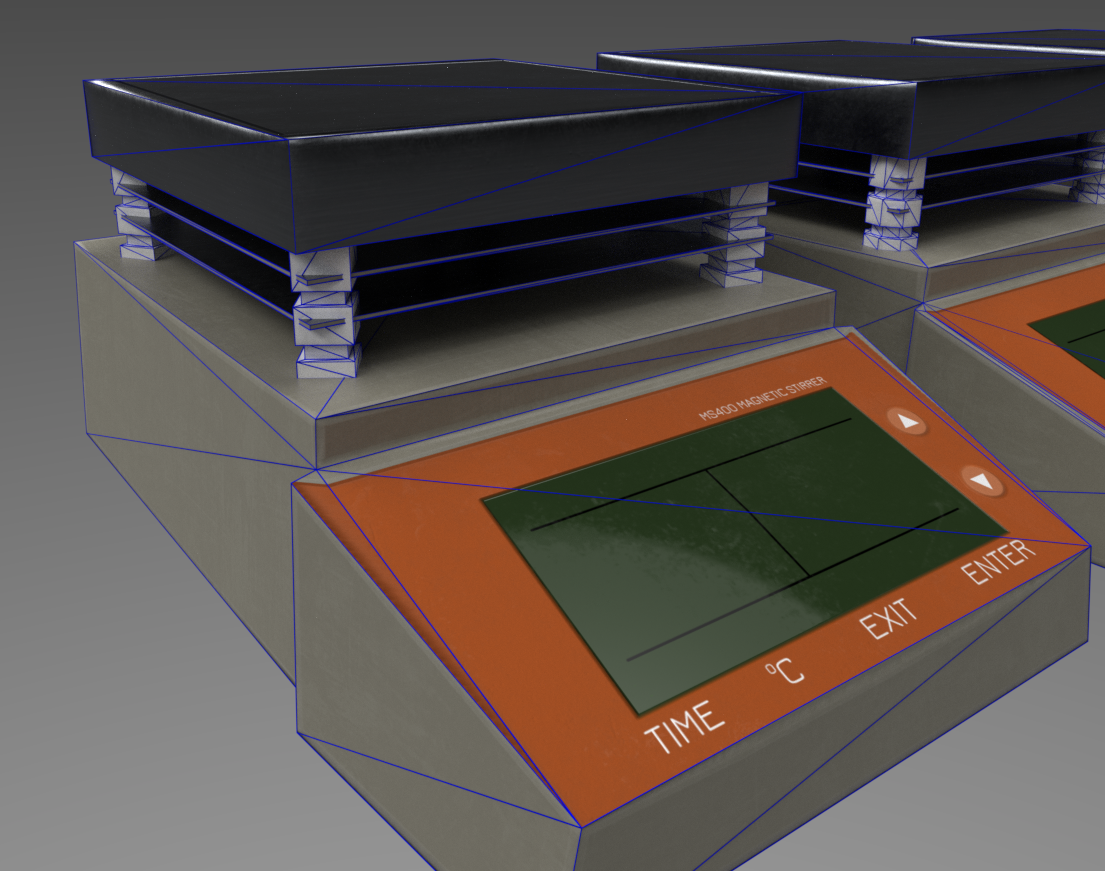
12 hours ago, mathiasxx94 said:
As you can see here this leads to no white border around the orange color for this mesh. Any nice tricks here, or is this acceptable considering the distance will be pretty large?
Ignore it, that model should be so small it only takes 16-64 pixels on the screen, with less than a pixel to render that border. Remember that textures and shaders get LODs, with textures it's called Mipmapping. By the time the last lod is rendered it lost most details.
It may be hard to believe so to test it render the last lod to a 64 pixel image and then zoom out in Blender till they are the same size. I remember when I started as a 3D modeler it sounded impossible to me, but yes most models in the background have textures less than 64*64 pixels.
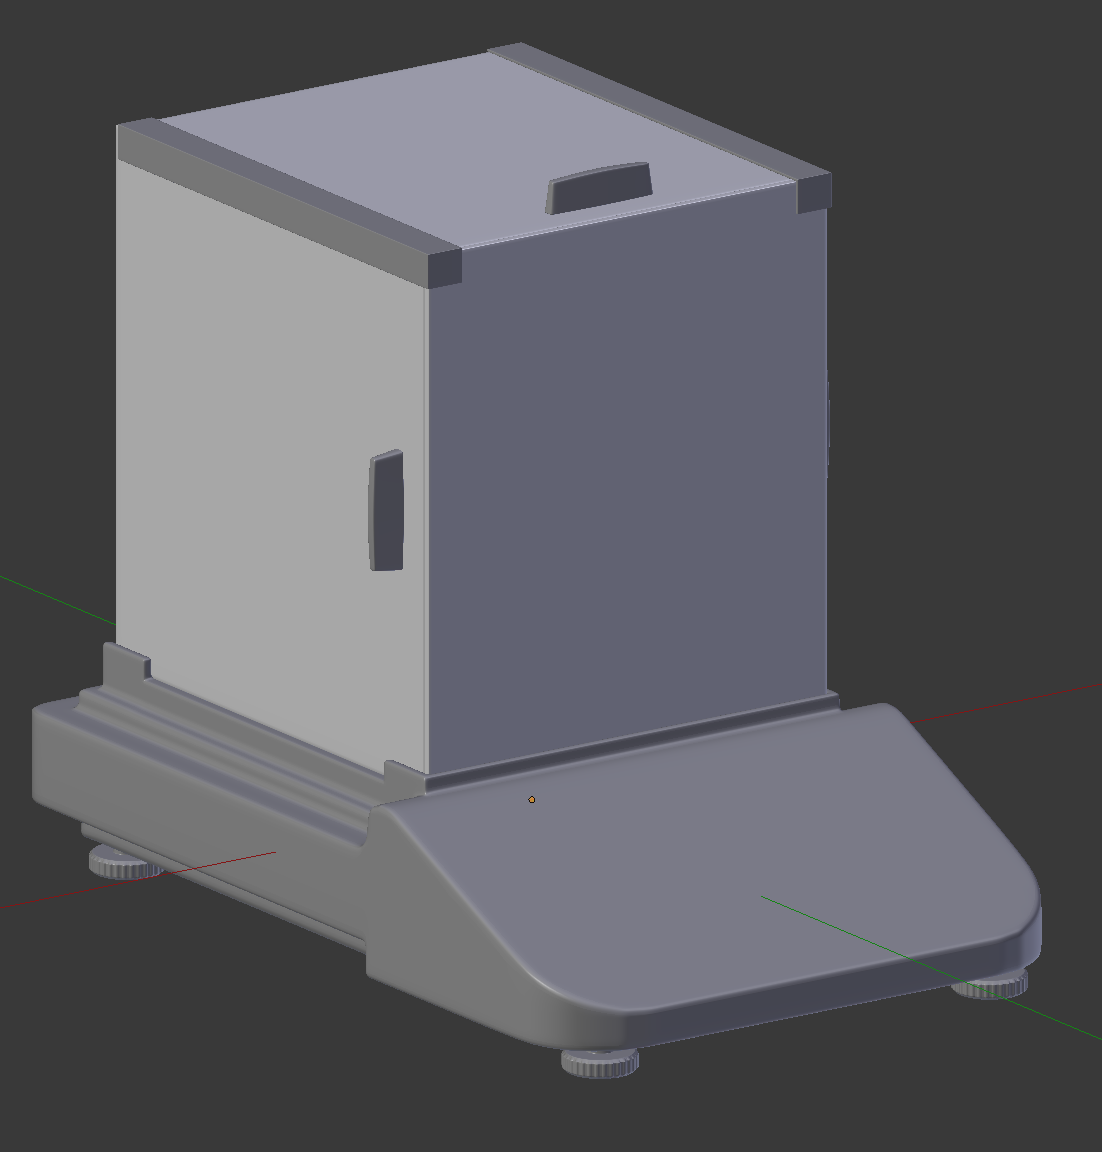
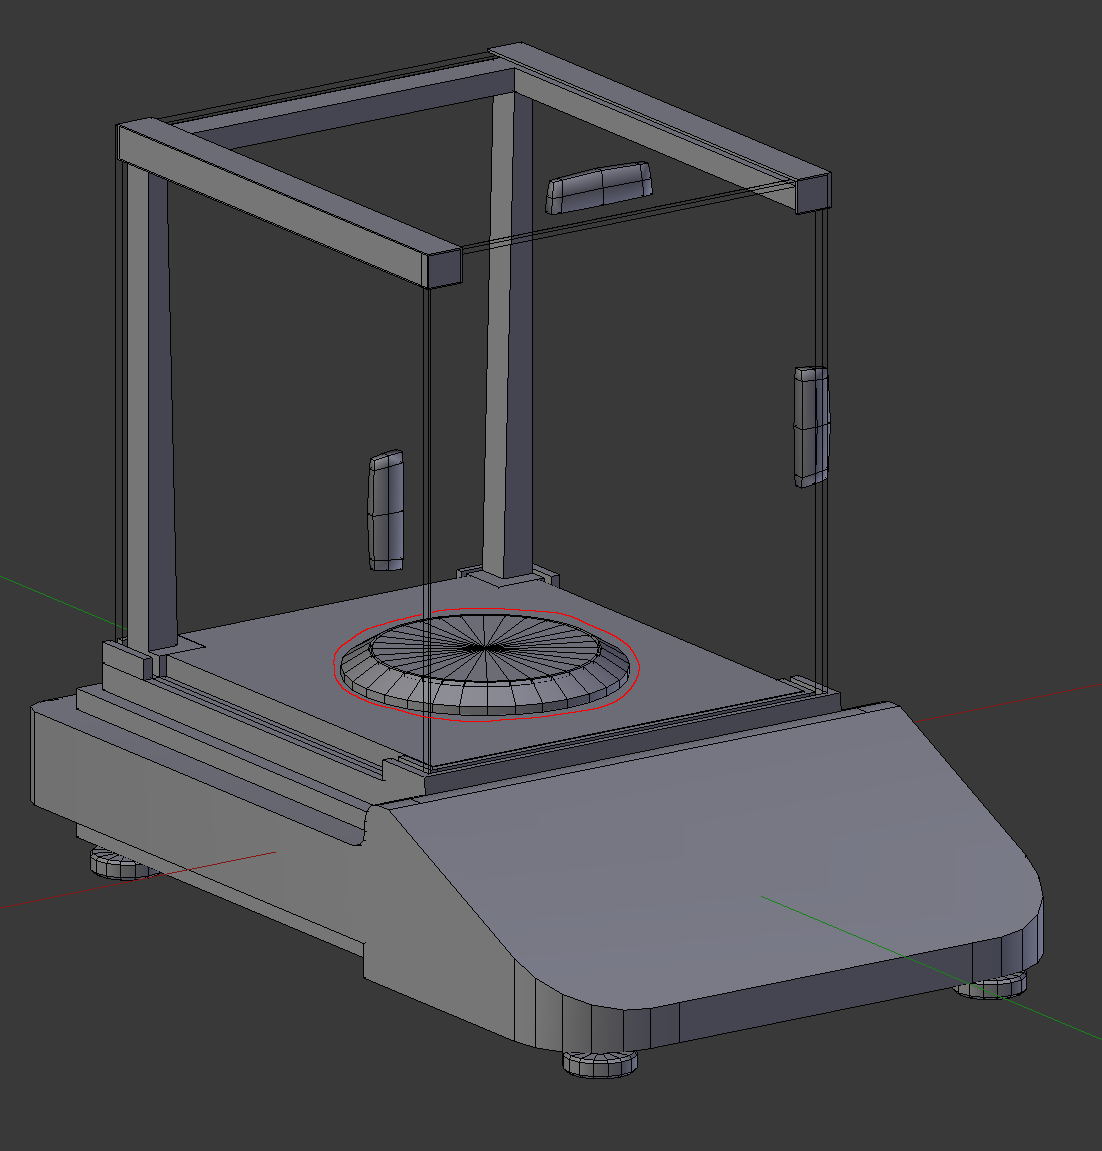
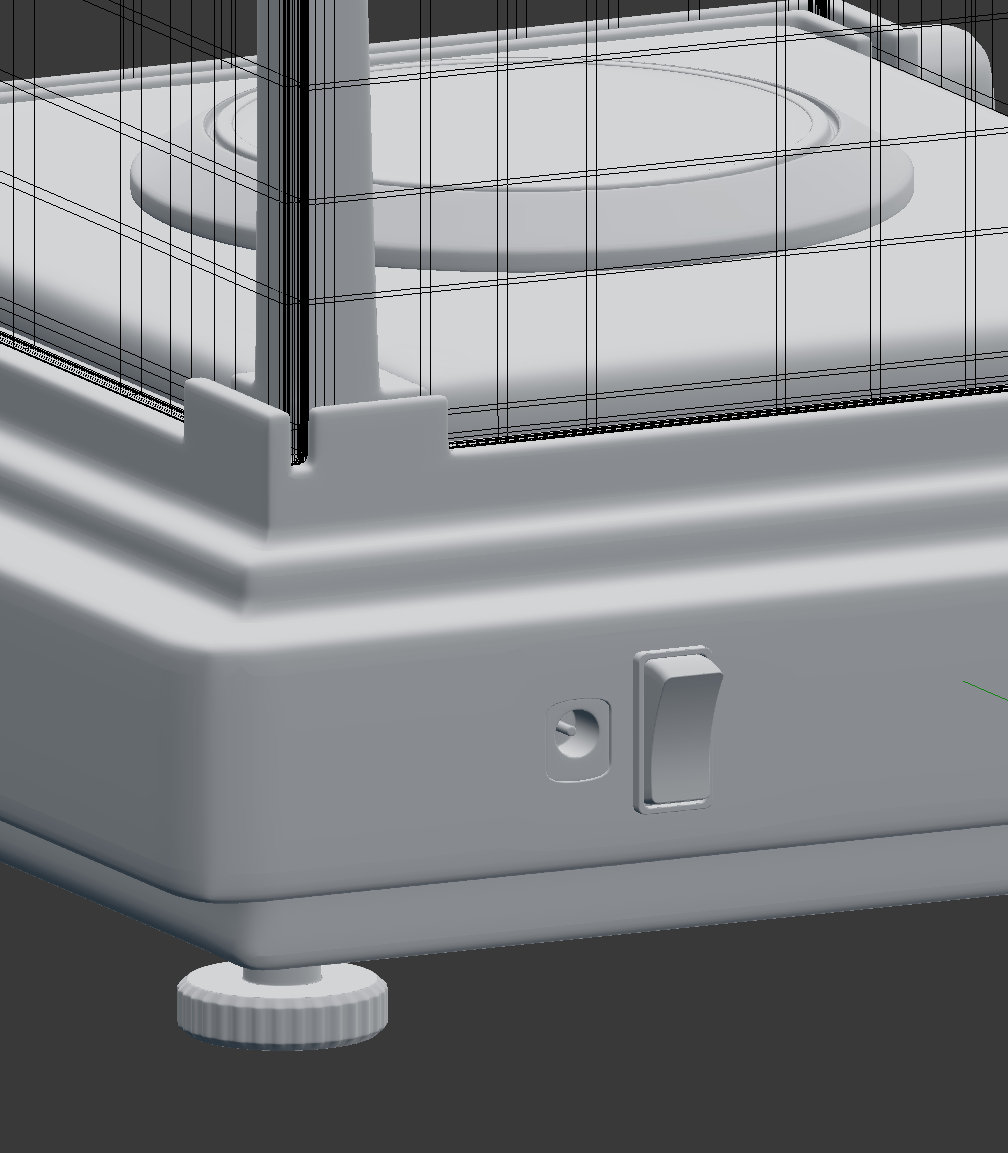
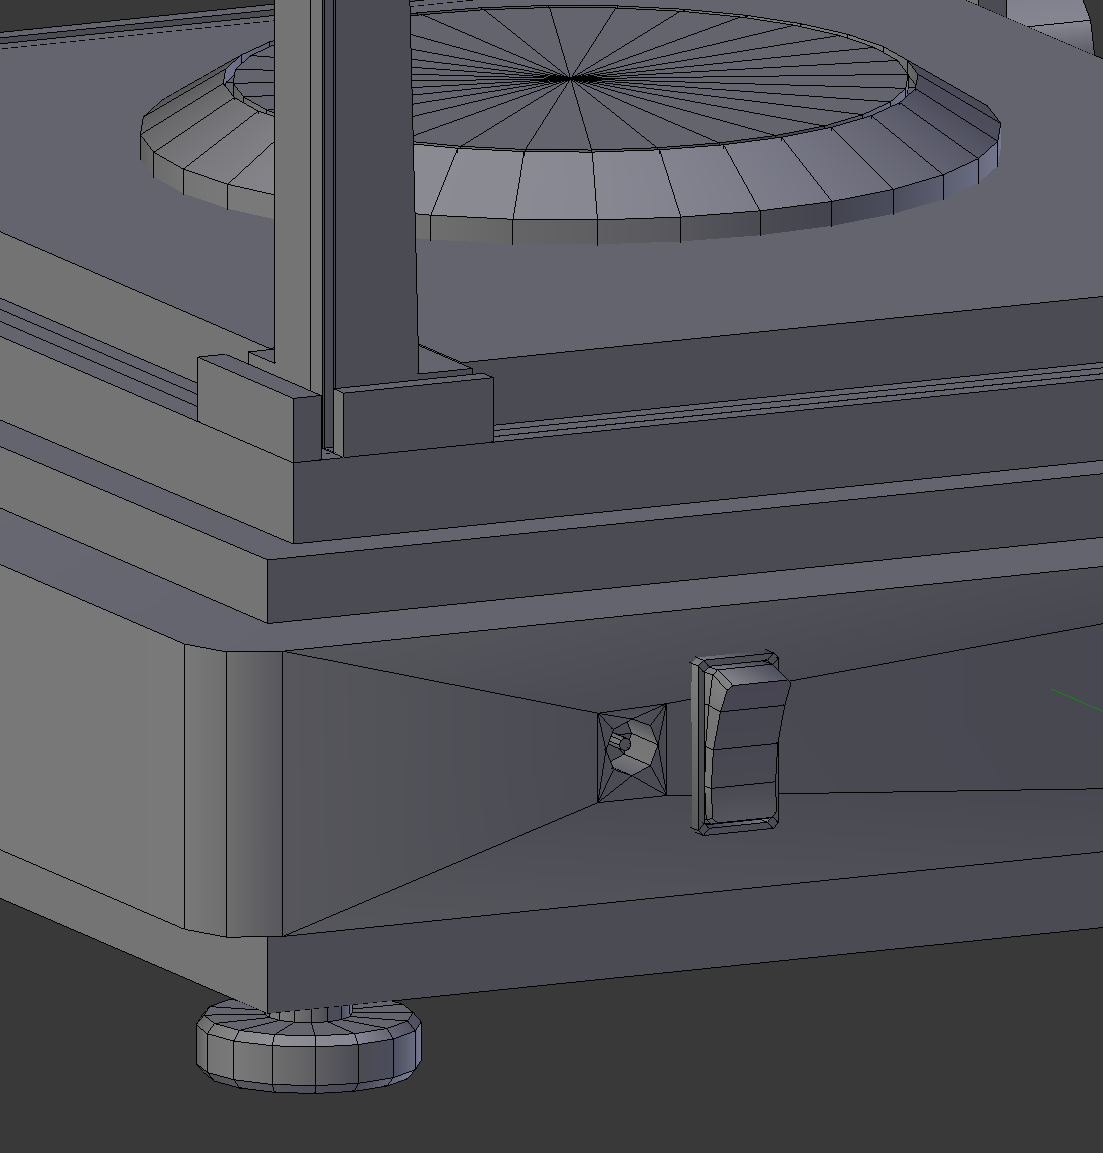
12 hours ago, mathiasxx94 said:
The part I've marked with a red circle in the second picture below is not connected to the main body of the balance since I would need a lot of extra triangles to connect it.
That part is right at the tipping point so it's your choice, you won't gain anything by making the hole the cost of texel vs poly should be equal here. Maybe make a hexagon, if you want?
Much more concerning is the topology of you circle, the pizza slices pole normal is going to be hell on shaders.
All in all good model 7.5 out of 10.